Distech
Install Software
Navigate to the Distech Controls webpage and click Log In on the top right of the page.
If you don't already have an account, create one with you HBT email.

Hoffman Building Technologies is an authorized dealer and the account approval process will be much faster if you use your HBT email.
Once your account is created, download the Software Center and launch.
Ensure you have a stable internet connection as the file is several gigs.
The Software Center has all available software downloads for Distech.
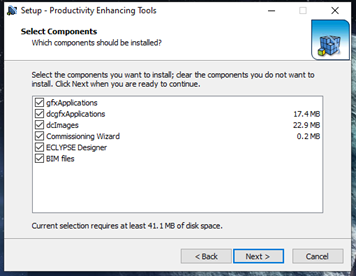
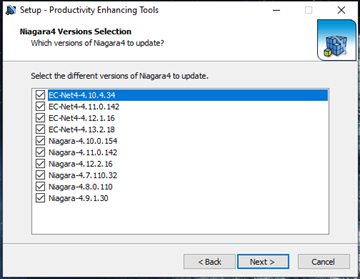
During software install, best practice is to select all installable components and all Niagar versions.
ECY Initial Setup
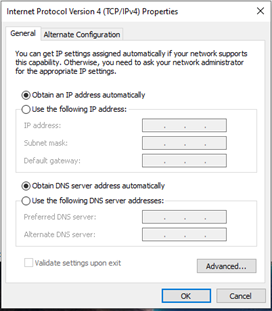
Ensure your machine is set to DHCP, and you do not have a static IP assigned to your Ethernet port.

Plug your Ethernet cable into either the Primary or Secondary port of the ECY controller.
Do NOT utilize the Subnet port of the ECY controller. It is a Power Over Ethernet (POE) connection and can cause harm to your machine. This port is only for Distech Auxiliary devices.
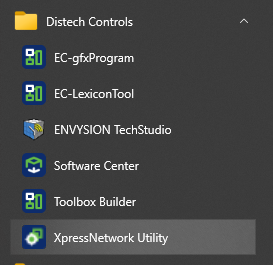
Launch the XpressNetwork Utility It can be found with either this desktop shortcut or under the “Distech Controls” folder in the Windows Start menu.
Click on the Find Devices in the top left corner
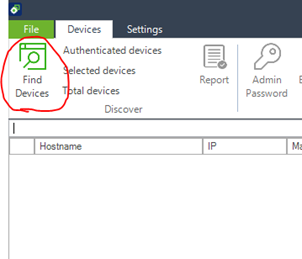
When prompted for Authentication Credentials, enter the default credentials Username: admin Password: admin

Once the devices are discovered and authenticated, they will populate in the software window.

The different information found in the discovered controllers list is explained below
| Field | Description |
|---|---|
| Green padlock | Indicates that the Xpress Network Utility has successfully connected to the controller at least once with the credentials you have previously provided, and the credentials have been cached. |
| Yellow padlock | Indicates that the Xpress Network Utility has successfully connected to the controller with the factory default credentials. The password for the admin account must be changed before the controller can be configured. |
| No padlock | Indicates that there has been no authenticated connection to the controller yet. |
| Hostname | A label or nickname to identify the controller on the network. The hostname can be used instead of an IP address to identify this controller on the network. The default hostname is eclypse-[last 6 characters of the controller’s MAC address] (e.g., eclypse-23a57f). The controller’s MAC address is shown on a sticker on the side of the controller. |
| IP | For a controller discovered through Ethernet, this is the IP address for the Ethernet port. For a controller discovered through its ECLYPSE Wi-Fi Adapter, this is the IP address for the wireless hotspot. |
| MAC | The permanent MAC address for the Ethernet port. |
| Wi-Fi MAC | The permanent MAC address for the wireless adapter. |
| Location | The physical location of the controller. This is exposed on the BACnet network as a device object property. |
| Description | A description of the controller’s function. This is exposed on the BACnet network as a device object property. |
| Firmware Version | The controller’s firmware version number. For ECLYPSE Building Intelligence (ECY Series generation 2) controllers, this includes all installed packages. |
| Host ID | The controller’s host ID. |
| Controller Name | A descriptive name by which this controller will be known to other BACnet objects. |
| Device ID | The controller’s current Device ID. |
| Model Name | The name of the controller’s model. |
The controller’s online and offline status is shown by icon color
| Field | Description |
|---|---|
| The controller is currently online. | |
| The controller may be currently offline, or non-responsive. | |
| The controller has the same MAC address as another controller in the list. Right-click the list and select Clear list, then click Find Devices to refresh the list. |
The first step to commissioning any Eclypse (ECY) controller is to change the default admin password. Without doing this, the controller will not accept any commissioning process or configuration changes
a. Select one or more controllers from the list of discovered controllers. See Discovered Controllers list.
b. Click Admin Password in the Devices ribbon.
c. Enter the new password twice to confirm and click OK. Your password is changed.
d. You can click the show password icon to ensure both passwords match.

Username: Admin
New Password: Rep4
e. When the password is changed, right click on device and select “re-authenticate”. This will turn the padlock icon from yellow to green
Select the controllers you wish to commission and launch the commissioning wizard.

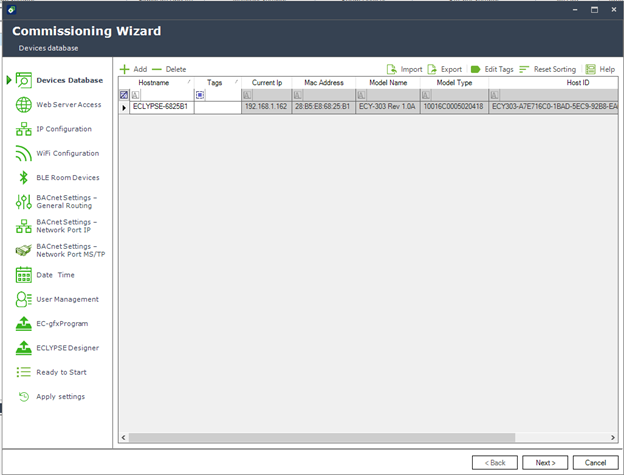
Click Next
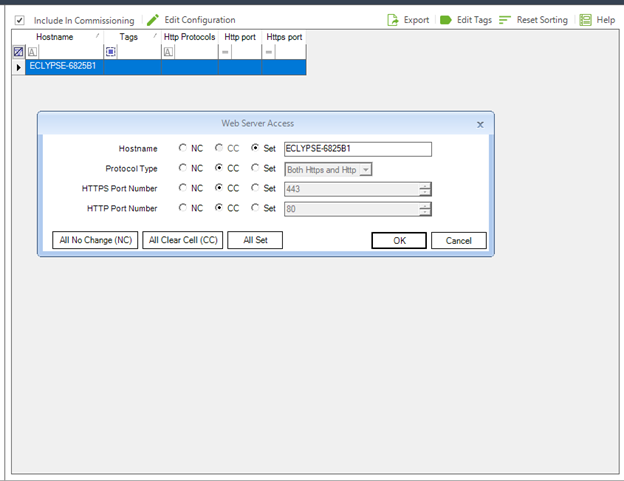
In this portion of setup refer to your site documents for which configurations to apply to the controller.
a. If the section of the configuration is applicable and needs to be applied, ensure you have clicked the “Include in Commissioning” check box to enable to configurations.

b. You can either Double-Click the device to display the pop-up window, or highlight the devices and click “Edit Configuration”
You can multi-select devices to apply a similar change to multiple devices at once.
To find more specific information about each section of the setup, refer to Distech's XpressNetwork Utility User Guide
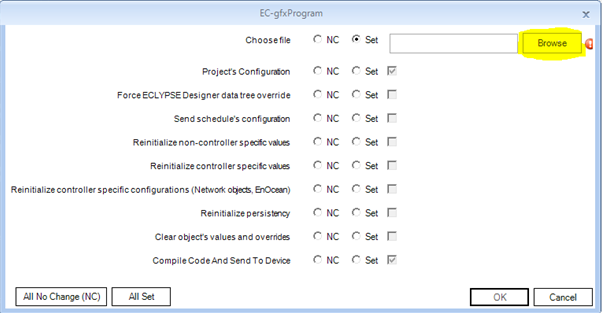
Once all the respective information for each controller has been set up from “devices database” to “user management”, the EC-gfxProgram can be selected to load
a. In some cases, Distech can send out controllers with Pre-Loaded applications. Not all Distech controllers will have DDC created from the Engineering team to load into the controller.
b. If you are loading DDC into the controller, select the device or devices that will use the DDC and “Edit Configuration”
c. Click “Browse��” to locate and select the DDC (.gfx) file on your local machine.
d. Click “Ok” and move on to the next step.
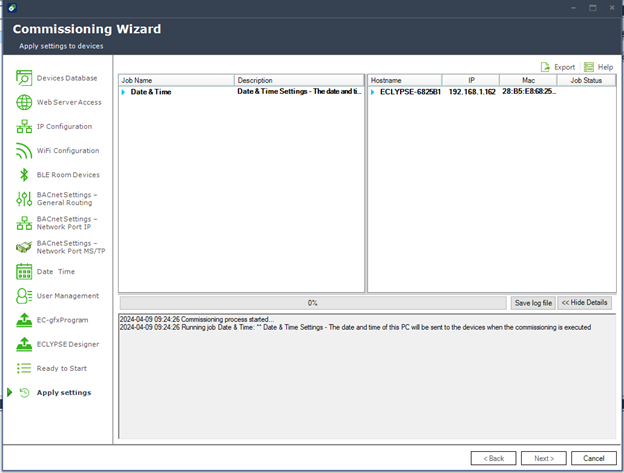
The second to last window will display the “Ready to Start” page.
a. This will show you a review of all the changes that it intend to make on the controller network.
b. Ensure that your changes are all there and you are in fact ready to apply them. If any need to be corrected, then click back to the required section to revise.
The final step will begin the application of changes. Allow this to go through each step and set up the controllers.
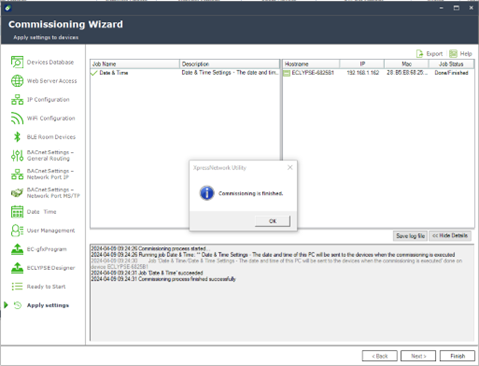
a. If the commissioning was successful, the Job name will have a green check mark (above).
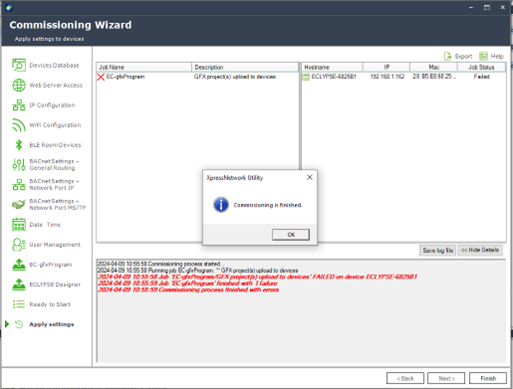
b. If there were errors, it will display a red “X” (above)
Error codes and log information can be located in the window below.
Appendix A: Minimum Recommended Software
- Distech Controls XpressNetwork Utility
- EC-Net Pro and Supervisor 4.xx
- Download the most recent version available.
- Distech Controls EC-gfxProgram
- Distech Controls Xpressgfx Points
- Distech Controls EC-Net Support Pack
- Distech Controls EC-Net BACnet AWS OWS Support Pack
- Distech Controls ECLYPSE Driver
- Productivity Enhancing Tools
Revision History
| Revision | Date | Name | Description |
|---|---|---|---|
| 1.0.0 | 7/16/2024 | Alex Dillenbeck | Initial Implementation |
| 1.0.1 | 12/5/2024 | Alex Dillenbeck | ECY Setup |